Skip to content
WooCommerce is the leading eCommerce platform, with a market share of 39%. Its flexibility and ease of use make it a go-to choice for online stores of all sizes. However, one critical step that can’t be overlooked in your store’s success is setting up WooCommerce payment gateways.
Payment gateways are the backbone of your online store. After all, 70% of shoppers abandon their carts if their preferred payment option isn’t available. Don’t let this happen to your store.
Whether working with a WooCommerce development agency or setting things up yourself, be sure to power up your online store with the right payment options. A proper setup boosts conversions and builds customer trust, ultimately helping your store grow.
So, how do you set up payment gateways for WooCommerce?
Let’s find out.
What Are Payment Gateways
A payment gateway is a tool that authorizes online transactions. It securely connects your store to your customer’s payment method, like credit cards, debit cards, or digital wallets.
Some of the most popular payment gateways for WooCommerce include:
- PayPal is a trusted name in online payments and dominates online payment processing with a 45% market share.
- Stripe is known for its flexibility and developer-friendly features, making it one of the best WooCommerce payment processing options.
- Square, with its extensive POS and online payment systems, is perfect for businesses with both physical and online stores.
- Authorize.Net by Visa is a solid choice for advanced requirements like recurring payments or customized integrations.

Prerequisites for Setting Up Payment Gateways
Before going ahead with the setup, make sure you have:
- WooCommerce Installed and Configured: You will need a functioning WooCommerce store on WordPress. If you haven’t installed WooCommerce yet, head to your WordPress dashboard, go to Plugins > Add New, and search for WooCommerce. Once installed, follow the setup wizard to configure your store basics.
- Accounts and Credentials: If you want to use PayPal, Stripe, or any other WooCommerce payment processor, create an account with them. Once you are signed up, you will be given API credentials (like client IDs, secret keys, etc.), which you will need during the setup. Additionally, make sure your website has an SSL certificate for secure transactions, as many gateways require it for compliance and customer trust.
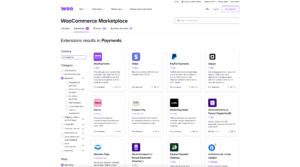
Check Your Payment Gateway Settings in WooCommerce
The Payments tab in WooCommerce is where you manage everything related to your store’s payment options. To find it:
- Log in to your WordPress dashboard.
- Go to WooCommerce > Settings.
- Click the Payments tab.
Once there, you can:
- Turn Gateways On and Off: Activate the ones you require and turn off those you don’t.
- Add New Methods: Add popular WooCommerce payment processors like PayPal, Stripe, or Square directly from this tab.
- Rearrange Payment Options: Drag and drop to set the display order of gateways at checkout.
- Configure Advanced Settings: Adjust currency, localization, or sandbox modes for testing.
Set Up a Payment Gateway
Once you are in the Payments tab, you can set up a WooCommerce payment processing method of your choice. Here’s how:
- Locate the Gateway: Find the payment gateway you want to enable, such as PayPal, Stripe, or Square.
- Enable the Gateway: Toggle the switch next to the gateway to turn it on.
- Set Up the Gateway: Click the Setup button next to the gateway to open its configuration page.
In the configuration settings, you can:
- Name the Gateway: Choose a clear, user-friendly title like “Pay securely with PayPal” and add a brief description for the checkout page. Keep it concise and to the point.
- Enter Provider Credentials: Add the API keys, client IDs, or other details provided by the WooCommerce payment processor. This keeps the gateway securely connected to your store.
- Customize Checkout: Create titles, descriptions, or instructions customers see during checkout.
- Process Refunds: Set up customized instructions to process refunds.
- Adjust Advanced Options: Some gateways allow you to enable features like test modes, localization, or specific checkout messages. If required, you can configure these features depending on your reach, target audience, and location.
- Save Your Changes: Once you have entered all the details, click Save Changes to finalize the setup.
Configure Specific Payment Gateways
PayPal and Stripe are the two most popular WooCommerce payment plugins. They are trusted by millions for their security, ease of use, and flexibility.
PayPal Setup
PayPal is a versatile payment solution that offers both hosted and API-based gateways, which simplifies its WooCommerce payment integration. It typically charges per transaction, though some versions include a monthly subscription option with add-ons like advanced fraud detection.
- Link Your PayPal Account
- In WooCommerce, go to Payments > PayPal.
- Enter your PayPal email address.
- Add API Credentials
- Log in to your PayPal business account.
- Find API Access under account settings and retrieve your API username, password, and signature.
- Add these credentials to WooCommerce.
Pro Tip: Before going live, enable Sandbox mode to test the payment process and ensure everything works as expected.
Stripe Setup
This WooCommerce payment plugin keeps customers on your website during the checkout process, which adds to their overall experience. With its developer-friendly nature, Stripe can be customized to meet your store’s requirements.
To configure Stripe in WooCommerce:
- Create a Stripe Account
- Visit Stripe’s website and sign up.
- Generate API Keys
- Go to Developers > API Keys in your Stripe dashboard.
- Copy your Publishable Key and Secret Key.
- Set Up in WooCommerce
- In the Payments tab, click Stripe and enter your API keys.
Pro Tip: Don’t go live immediately. Once everything is set, test it in the Sandbox mode. Enable live mode to start accepting real payments only if everything is working smoothly.
Other Payment Gateways
In addition to PayPal and Stripe, you can find options like Square and Autherize.Net. Like most WooCommerce payment plugins, they require a similar setup—create an account, obtain the required credentials, and configure them in WooCommerce.
Square is perfect for businesses with a physical store. It combines the in-store payment system with its WooCommerce payment gateway. On the other hand, Authorize.Net supports multiple payment options, including credit/debit cards and digital wallets. It also includes advanced fraud detection tools, making it a safe bet for your online store.
Test Your WooCommerce Payment Gateways
Test your WooCommerce payment gateways before going live. A tried and tested payment method goes a long way in building trust and increasing conversions.
- Sandbox Mode: Most WooCommerce payment plugins, like PayPal and Stripe, offer a sandbox or test mode. This feature allows you to simulate transactions without processing real payments. Use the test credentials provided by the provider to check how the system behaves under different circumstances, such as successful payments, failed transactions, and refunds.
- Make Test Purchases: Place several test orders using the gateway’s dummy credit cards or accounts and verify each payment. Test different amounts and payment methods to confirm your WooCommerce payment integration was successful.
- Check Email Notifications: Check if customers receive the right email confirmations after placing an order. Test notifications for successful and failed transactions and refunds.
- Review Gateway Logs: Many WooCommerce payment gateways provide detailed logs for debugging. Check these logs to confirm all transactions are going through as expected.
- Test Refunds and Cancellations: Simulate refund requests and order cancellations to be sure your gateway processes them correctly and updates the order status in WooCommerce.

Manage and Troubleshoot Payment Gateways
WooCommerce payment integration requires periodic monitoring. Payment issues can arise from time to time, making it necessary to manage and troubleshoot them quickly and effectively.
So, you should:
- Monitor Transactions
Keep a close eye on your orders to make sure all payments are processed accurately. Regularly review transaction logs to identify inconsistencies, such as declined payments or duplicate orders. This will help you catch and address potential problems before they escalate. - Resolve Common Issues
Even the best WooCommerce payment gateways can encounter occasional hiccups. So, address them before it’s too late:- Failed Payments: Verify that your API keys, client IDs, or other credentials are correctly configured in the Payments tab. Incorrect credentials often lead to payment failures.
- Customer Complaints: If customers report issues like unprocessed payments or missing confirmations, review your gateway logs and order status. Find out where the error is, whether on your website, the gateway, or the customer’s end.
- Timeout Errors: Check your hosting server’s performance and ensure it can handle the payment gateway’s API requests. A slow server might lead to incomplete transactions.
- Enhance Security
Payment security is non-negotiable. Strong security measures keep both your business and your customers safe from potential threats. A staggering 80% of organizations experienced payment fraud attempts or attacks in 2023, which highlights the importance of secure payment gateways.- SSL Certificates: Always use an SSL certificate to encrypt sensitive data exchanged during transactions. This keeps payment details secure and instills confidence in your customers.
- Limit Admin Access: Restrict access to WooCommerce payment gateway settings. Grant admin privileges only to trusted users to reduce the risk of accidental changes or unauthorized tampering.
- Enable Two-Factor Authentication (2FA): Use two-factor authentication to protect your admin account with an extra layer of security.
- Test Gateway Functionality
Periodically test your payment gateway’s functionality, even after it’s live. Use sandbox environments to simulate transactions, especially after updates or changes. - Keep Plugins Updated
Outdated WooCommerce payment plugins can lead to compatibility issues or security vulnerabilities. Regularly update your plugins and verify all updates in a staging environment.
If your payment gateways continue to struggle, consult a professional WooCommerce maintenance service provider. Experts can quickly identify problems, provide reliable fixes, and ensure your payments go smoothly.
Use Advanced Payment Gateway Features
Many WooCommerce payment gateways come with advanced features that let you take your store to a whole new level. Some of these features include:
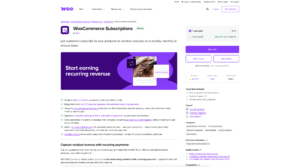
- Recurring Payments: Offer subscription-based products or services using plugins like WooCommerce Subscriptions. It’s perfect for membership programs, SaaS products, or regular deliveries.
- Multi-Currency Support: Accept payments in multiple currencies to cater to a global customer base. Gateways like Stripe and PayPal handle currency conversion automatically, allowing you to tap into international customers.
- Localization Options: Customize payment methods based on customer regions. For example, adding local payment options like Klarna or Afterpay can increase conversions as they make the checkout process more familiar.
- Custom Checkout: Many payment gateways let you tailor the checkout flow to fit your brand, which improves user experience and trust.
While plugins make setup easier, they typically lack customization. Custom WooCommerce development services are worth considering if your online shop requires specialized or more advanced payment options. This could include unique checkout workflows, integrating less common payment gateways, or creating fully personalized subscription models.
Conclusion
Secure payments build trust and keep your store running efficiently. So, when you set up payment gateways for your WooCommerce store, be sure to do it right the first time. Additionally, test, monitor, and customize your payment methods regularly to keep the orders coming in. Taking these steps will help your online store grow.
Need customized payment solutions? Reach out, and let’s start optimizing your payment setup today!