Skip to content
When it comes to online shopping, finding the right product fast is what keeps your customers engaged. However, your WooCommerce store has only 52 to 54 seconds to grab a shopper’s attention—anything beyond that risks losing them.
Enter advanced WooCommerce product filters.
A cluttered store drives customers away, but creating advanced product filters for your WooCommerce site is a reliable way to keep them glued. Filters like Ajax filtering, price sliders, and attribute-based sorting speed up searches and increase conversions.
In this quick read, our experienced developers will explain everything you need to know about advanced WooCommerce filters.
What Are Advanced Product Filters
We live in a world of instant gratification, where customers expect quick, accurate results when browsing your online store. While WooCommerce offers basic filters, those aren’t enough to keep your customers engaged and happy.
But with advanced WooCommerce product filters, your customers can refine searches by price, category, brand, color, size, rating, and availability—all with just a few clicks. Unlike basic filters, they offer dynamic, real-time results with Ajax, eliminating page reloads.
So, advanced WooCommerce filters offer:
- Faster Shopping: No one has time to dig for products.
- Better User Experience: Simple, intuitive navigation keeps customers happy.
- Higher Conversions: If your customers find what they want fast, they are more likely to buy it.
- Lower Bounce Rates: Your store visitors stay longer when filtering is smooth.
- Competitive Advantage: Top stores use smart filters; so should you.

Prepare Your Store for Adding Advanced Product Filters
Creating advanced product filters for a WooCommerce site requires a solid foundation. If your store’s structure is messy, these filters won’t work as intended. This means you need to:
1. Update Your Store
An outdated WooCommerce setup can break filters. Update your online store, themes, and plugins regularly. Do this manually and in a staging environment, as updates can sometimes lead to functionality and security issues.
2. Organize Your Product Data
Next, organize your product data. Advanced WooCommerce filters rely on well-structured categories, attributes, and tags. Every product should have relevant attributes, like color, size, material, and brand. Categories should be logical and easy to navigate to help customers refine searches effortlessly. Likewise, carefully placed tags help users refine their product search.
3. Check for Compatibility
Not all themes and plugins support advanced WooCommerce product filters, and a poorly integrated filter can slow down your site. Testing your setup beforehand prevents conflicts and ensures that the filters work seamlessly.
Choose the Right Filter Plugin
There is no shortage of filter plugins for WooCommerce, but not all are created equal. The right plugin makes product searches effortless, while the wrong one slows your store down. So, when choosing a plugin, think about:
- Compatibility: The plugin must work with your theme and WooCommerce version to avoid glitches and slowdowns. Always check compatibility before installing.
- Customization: Filters should match your store’s design. Look for plugins that allow color, layout, and style adjustments.
- Performance Optimization: Ajax filtering updates results instantly, preventing page reloads.
- Regular Updates & Support: A well-maintained plugin with frequent updates and active support prevents security issues and bugs.
The three most popular filter plugins that fit this bill are:
1. YITH WooCommerce Ajax Product Filter
This is one of the best filters for WooCommerce, especially for getting instant results. YITH WooCommerce Ajax Product Filter updates search results in real-time without page reloads, which makes shopping easier. Customers can filter your products by price, category, attributes, and stock status. It’s also highly customizable, so you can tweak the look to match your store’s design.
2. WooCommerce Product Filter by WooBeWoo
WooBeWoo’s WooCommerce Product Filter offers a drag-and-drop builder for quick setup. It works well with Elementor and Divi, so you don’t need coding skills to integrate it. With multi-select filtering, it lets users pick multiple attributes at once, leading to more accurate results and a smoother shopping experience.
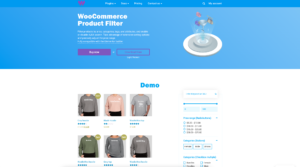
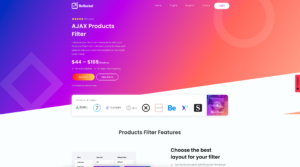
3. Product Filters for WooCommerce
This plugin comes with AJAX-powered filtering and allows your users to refine searches by category, attributes, tags, taxonomies, price, and stock status without refreshing the page. The filter elements include price sliders, checkboxes, radio buttons, dropdowns, color lists, and more.
It also features “Products Filter” and “Notes for Product Filters” widgets, plus shortcodes that integrate seamlessly with product displays. Adaptive filtering and product counts make the experience even more user-friendly.
4. Husky
If you’re looking for a free option, Husky (formerly WOOF) is a solid choice. It is a perfect filter for WooCommerce stores with complex structures. It’s powerful but still lightweight, so it won’t slow your store down. This plugin offers advanced filtering for categories, attributes, prices, SKUs, and custom meta fields—ideal for stores with complex product catalogs.
Install and Activate Your Product Filter Plugin
Once your store is ready, and you’ve picked a plugin, you can install it through your WordPress dashboard. Here’s how:
- Go to Plugins > Add New
- Search for your chosen filter plugin
- Click Install Now, then Activate
- Go to the filter settings provided in the plugin
After that, you can configure your filter settings.
Configuring Filter Options
After adding a WooCommerce product search filter, you will need to configure it, so your customers can quickly find what they need. This typically involves:
1. Setting Up Filter Criteria
Your filters should match how shoppers browse your store. You can use different criteria based on the size and structure of your store. For instance:
- Price Range Filters are a must if your products vary in price.
- Category Filters help your customers organize products in broader types or sections.
- Attribute Filters like color, size, and brand result in more refined searches.
- Stock Status Filters let users view only in-stock items and add to their shopping experience.
2. Placing Filters on Your Store
Where you place your filters affects how easily customers can use them. Some of the common placements include:
- Sidebar (Left or Right): This is a preferred choice for desktops and keeps filters visible while browsing.
- Above Product Grid: The top bar is ideal for quick sorting, helping users filter by price, popularity, or new arrivals.
- Tag Filters: Lets users filter products using tags like “Best Seller” or “New Arrival.”
- Rating Filters: This enables users to filter products by customer reviews and star ratings.
- Custom Meta Filters: Uses custom fields to filter products based on additional metadata such as Brand or Expiry Date.
- Search-Based Filters: Allows keyword-based filtering for more precise search results.
- Off-Canvas Menu: This menu type is best suited for mobile layouts. It keeps your WooCommerce filters hidden until needed to maintain a clean interface.
3. Customizing Filter Design
Filters should match your store’s branding and be visually intuitive. So, when creating a filter for a WooCommerce store, be sure to use the correct:
- Button Colors: Adjust it to match your store’s theme for a cohesive look.
- Font Size and Style: Keep the fonts readable and consistent with the rest of your store.
- Filter Layout: Choose dropdowns for a compact look or checkboxes/sliders for a more interactive experience.
Boost User Experience with Ajax Filters
Ajax filtering dynamically refreshes product listings as users apply filters, providing real-time updates without interrupting their browsing experience. It provides:
- Faster Browsing: No more waiting for slow page reloads.
- Better UX: Creates a smooth, responsive experience, keeping customers engaged.
- Increased Sales: Quick product search leads to faster decision-making and more purchases.
- Lower Bounce Rates: Shoppers stay longer when navigation feels effortless.
Most advanced WooCommerce product filter plugins have a built-in Ajax option. Activating it is simple:
- Go to Plugin Settings: Go to your filter plugin’s settings panel in WooCommerce.
- Enable Ajax Filtering: Toggle the option to allow instant, page-free updates.
- Test Functionality: Apply filters and check if results update immediately without refreshing the page.
Activating Ajax filters is easy enough, but if your plugin doesn’t have a built-in solution, you should hire a WooCommerce agency to choose, install, and configure the advanced filters.
Use Advanced Customization and Styling
While a WooCommerce product filter plugin offers default styling, it may not always be the right fit for your store. If you want something that enhances the overall look of your website, modify your theme or use custom CSS to adjust your filters.
1. Customize Filters with CSS
If filters don’t match your store’s style, tweak them with CSS:
.woocommerce-filter-widget {
background-color: #f8f8f8;
padding: 10px;
border-radius: 5px;
}
2. Implement Custom Filter Logic
For unique filtering needs, use WooCommerce hooks and custom code:
add_filter(‘woocommerce_product_query_meta_query’, ‘custom_filter_logic’);
function custom_filter_logic($meta_query) {
$meta_query[] = array(
‘key’ => ‘_custom_attribute’,
‘value’ => ‘value_to_filter’,
‘compare’ => ‘=’
);
return $meta_query;
}
Please note, the above shared CSS and custom hooks depend on the plugin you are selecting, and it’s different for each one. In other words, this requires knowledge of custom WooCommerce development. If you haven’t done this before or need help configuring your filters, you should partner with professional developers.
Test and Optimize Your WooCommerce Filters
Before making your WooCommerce product filters live, run thorough tests across different devices to check if they work as intended. This means you should:
1. Check Filter Functionality
Be sure your filters work exactly as shoppers expect. After running the checks, ask these questions.
- Do all filter options (price, category, attributes, stock status) work correctly?
- Are filtered results accurate and relevant?
- Does the AJAX filter update results instantly without reloading the page?
2. Test Performance Impact
If they lack optimization, WooCommerce filters can slow down your store. This often frustrates your customers and affects your sales. The three proven ways to optimize them are:
- Enable Caching for filter queries to speed up results.
- Limit the number of visible filter options to avoid overwhelming users.
- Choose a lightweight filtering plugin instead of a bloated one that drags down speed.
3. Gather User Feedback and Track Performance
Gathering customer feedback and tracking performance are the two best ways to know if your filters are actually helping. If possible, you can conduct a quick survey to get valuable insights from your existing customers.
Another way to know if your WooCommerce product filters are living up to their mark is by tracking performance through Google Analytics. This free tool can provide you with a few critical insights, including:
- How frequently do your customers use these filters?
- How much time do they spend on filtered product pages?
- Changes in conversion rates before and after filter implementation.
Integrate Filters with Search and Navigation
Filters work best when combined with your WooCommerce product search and navigation. Integrating them with search and menus helps create a memorable shopping experience that often leads to better user engagement and boosts conversions.
So, you should:
1. Ensure Filters Work with Search
Your WooCommerce filters should refine search results, making it easier for customers to find products quickly.
- Enable Search + Filter Compatibility: Be sure users can apply filters after entering a search term to help refine search results without hassle.
- Enhance WooCommerce Product Search: The default WooCommerce product search is limited. Plugins like Relevanssi, FiboSearch, Ajax Instant Search for WooCommerce, or SearchWP can improve search accuracy by indexing product descriptions, attributes, and custom fields, ensuring better results.
2. Link Filters with Menus and Categories
Integrating filters with your store’s navigation helps users browse efficiently.
- Add Filter Links to Menus: In the navigation, include direct links to filtered pages, such as “Best-Selling Shoes” or “Shop Under $100” for quick access.
- Pre-Filtered Category Pages: Instead of making customers manually apply filters, create category pages with preset filters to speed up the shopping process.
A strong filter and search integration simplifies the user experience and reduces bounce rates. If your store struggles with performance issues, consider working with a WooCommerce maintenance service provider to optimize filters, search functions, and overall store speed.
Conclusion
Adding advanced product filters to your WooCommerce store helps your customers find what they want without frustration. This improves the user experience, speeds up product searches, and knocks conversions out of the park.
With these tips, you can create advanced filters for your store. However, you can always hire professional developers from CoSpark to take care of all your WooCommerce development and design needs.
Whether you need help with advanced filtering, improving website speed, or scaling up your store, we are here to help. Reach out to us today forpersonalized supportand solutions.